Blog

Tips For Making A Move Easier On Pets

Moving is usually stressul for everyone, but it can be especially vexing for the furriest members of the family. If you're moving with pets, there are a few things you can do to help them stay calm and acclimate to their new environment more easily.

 Before the move:
 -Request your pet's records from the veterinarian. Having those handy when  you visit a new vet will help make the switch seamless. There won't be any  question about medication names or due dates for vaccines.

 -Buy a new collar with updated tags. You'll need to make sure you have your  new address and phone number printed clearly.

 -Check to see whether the county or state you're moving to requires pet licenses. If so, register them in advance so you'll have the tags ready for the new collar.

-Take your time with packing. The more of a "norm" it becomes for pets, the less stressed they'll be when they see their home being upended from top to bottom.

-Make sure you have a refill of any medications so you don't run out during the move or before you can find a new vet.

During the move:
-Keep your pet in its crate. Even though it might seem cramped and uncomfortable, it will actually bring them a little comfort during the stress of travel. It'll also keep pets and other travelers safe.

-Make sure food, water, medications, toys, etc., are easily accessible.

-If you're driving, don't forget to make regular stops for bathroom breaks!

After the move:
-Lay out your pet's essentials before unpacking so he or she has a few familiar items in a strange new house.

-Start a new routine right away. Pets need routine to feel comfortable. Allow them to familiarize themselves with the neighborhood or surrounding area.

-Seek out a new vet right away if you haven't already done so, and find out where to take pets in the event of an emergency.

Do you have other tips for helping make a move go smoothly for family pets? Let us know in the comments section!


How-To Tuesday: Paint A Piece Of Wood Furniture


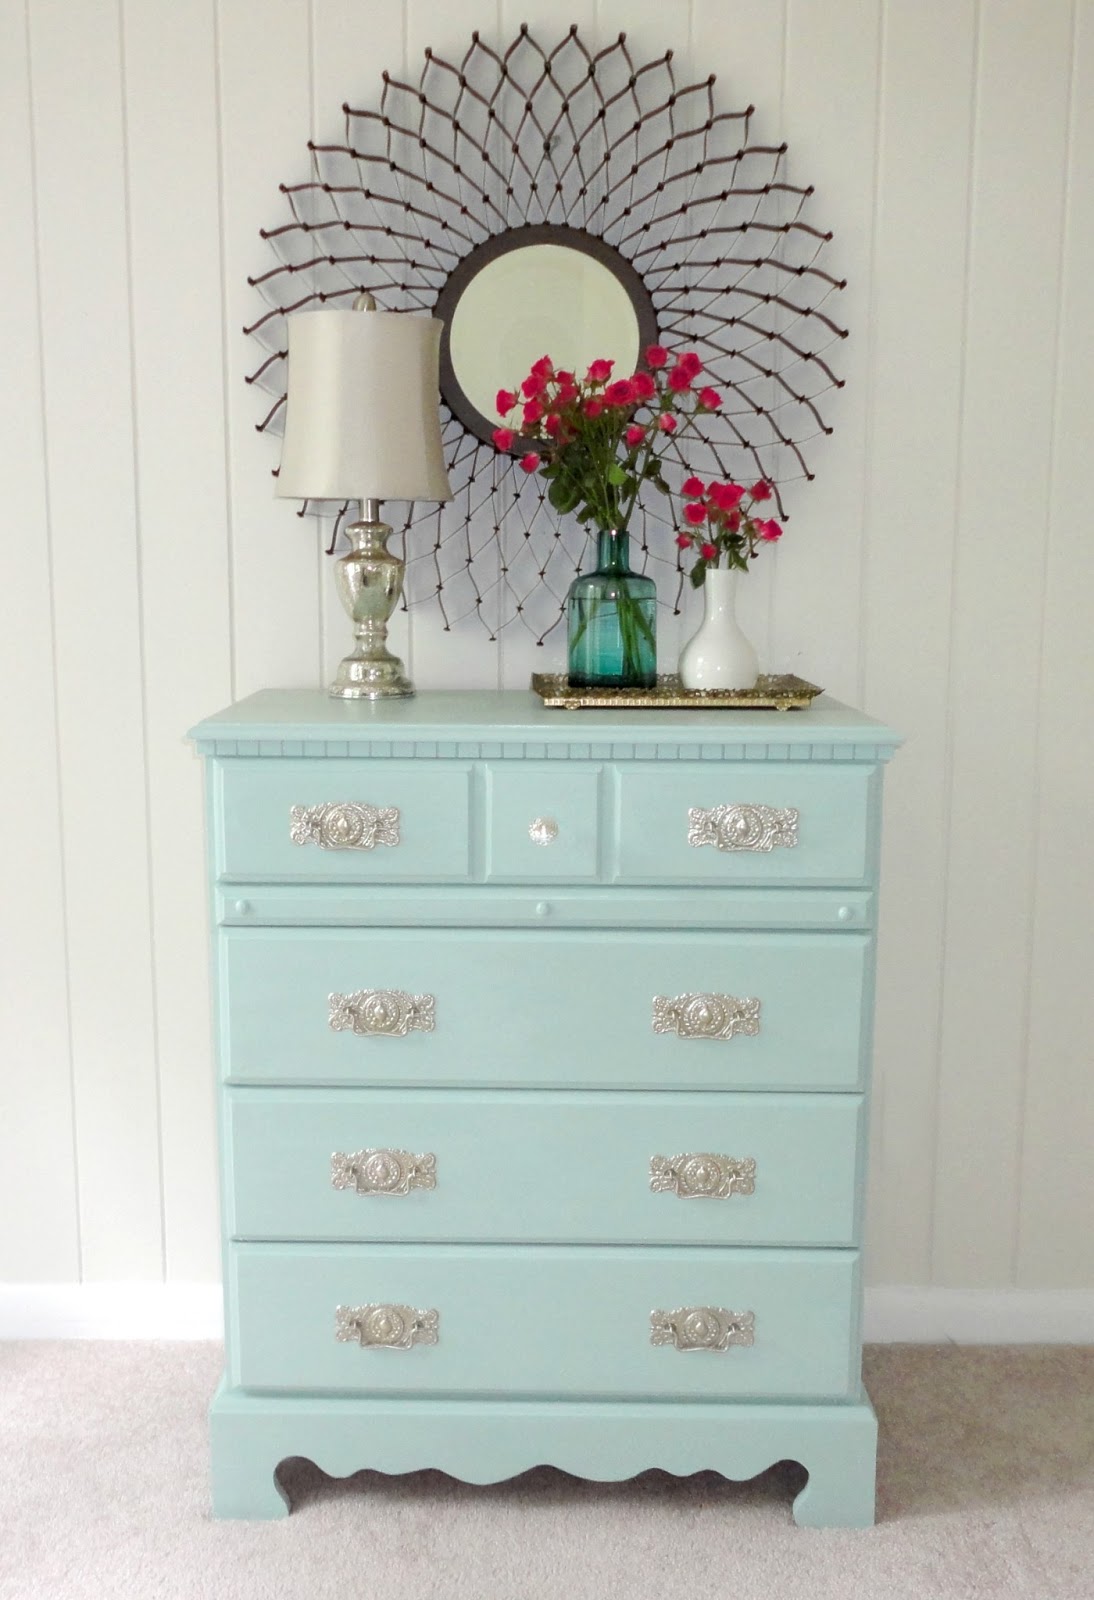
Painting old furniture has become a great money-saving trend in the design world. It's much more convenient and thrifty to salvage a piece or breathe new life into one you already own than it is to spend time searching for the perfect new piece that fits your budget. In just a few short steps, you can have a brand new, custom piece of furniture that fits in seamlessly with the rest of your decor.

Step 1
Remove the hardware and clean the piece of furniture well, especially if you rescued it from a junk heap, yard sale, or thrift store. Use damp paper towels or a rag to remove any dust or dirty spots. Pay close attention to corners, where dirt and sawdust can gather.

Step 2
Decide on the perfect paint color and finish. Think about the room this piece of furniture will live in. Sleek, modern decor begs for a shiny, polished piece, while a seaside cottage style might require something matte.

Step 3
If you're working with stained wood, give it a light sanding. Don't sand too hard, or you could damage the wood. If you're painting over laminate, there's no need to sand. In fact, it could damage the surface and make your paint job look messy.

Step 4
Clean it again! Use paper towels or a soft rag to clear away any grit left over from sanding.

Step 5
Prime your surface. Don't skip this step! Priming will help the paint adhere and last and keeps you from having to apply multiple coats of color. If your piece is laminate, a primer that's made for adhesion is absolutely necessary. No ifs, ands, or buts. Use a foam roller to get a thin, even coat.

Step 6
Once the primer is dry, it's time to add some color. Use another foam roller to paint the piece. If there are small crevices, apply paint with an angled brush and then smooth it over with the foam roller. Allow to dry for at least a few hours before you apply a second coat.

Step 7
Give the piece a coat of polycrylic to finish it. This step is optional, of course, but it will help keep the piece durable and looking great. Polycrylic is low-odor and won't yellow over time.

Step 8
Change the hardware. This is optional as well, but a new look deserves new accessories! Choose something modern or browse antique or salvage shops and websites for older options. You can customize them with a quick coat of spray paint.

Painted furniture can change the look of a room completely, giving it the perfect pop of color you didn't know you'd been missing. Of course there are purists who cannot fathom the thought of covering a mid-century mod stereo cabinet or antique hutch, for example, in aqua paint. But listen to your own needs and tastes and do what's best for you. What's your opinion on painting old furniture? Tell us in the comments section below!

(Photo credit: livelovediy.com)


7 Steps To Turning Your Home Into A Rental Property

Becoming a landlord isn't as easy as handing over the key to your house and collecting rent. Here are 7 steps to help you turn your home or investment property into a rental property. 

1.Start updating. You want your house to be somewhere tenants will love to live. Make sure everything is up to date and that you can compete with other similar rentals on the market. Update plumbing and electrical work, and fix leaks and toilet problems. You might want to consider updating or upgrading some features as well. Even if the property is in great shape, you'll probably need to do a few minor things here and there. Give the house a deep cleaning, steam or replace carpeting, and give the walls a fresh coat of neutral paint.

2. Change status. Depending on where you live and your mortgage, you might need to let your mortgage company know that your home is now considered an investment property.

3. Change insurance. You won't need homeowners insurance anymore, but you WILL need insurance specifically for rental properties in order to cover yourself and your property.

4. Decide who will manage the property. You might save money by doing it yourself, but the potential stress gained and time spent on managing your rental might not make those cash savings worth it. Property management companies usually charge around 10% of the month's rent, but they will handle everything for you, from collecting rent to supervising maintenance to evicting tenants.

5. Determine what you will charge. If you hire a property manager, he or she will know just how to price your home. If you're managing it yourself, search for comparable rentals in the area to find a jumping-off point for determining your rental rate.

6. Screen applicants. All applicants should be employed, have good references from previous landlords, and should make around three times more than the monthly rent. Their background checks should be free of felonies, recent evictions, judgments, criminal activity, or bad finances. Property management companies will take care of all of this for you. You should also know that landlords, no matter if you own one single family home or an entire apartment complex, are bound by the Federal Fair Housing Act, which prohibits discrimination based on race, color, national origin, religion, sex, familial status, or handicap.

7. Sign a lease. Even if you decide to rent to a friend or family memeber, NEVER assume that an oral contract will be sufficient. Draft a lease that spells out all the details. This will protect both you and your tenant and is legally enforceable.

Do you own a rental property? What have your experiences been in the world of tenants and landlords?


13 Life Hacks For Homeowners

 1. Porcelain sink stains: Use a toilet cleaning product and scrub in circles. If that doesn’t work, try the tried-and-true Bar Keeper’s Friend. As a last resort, use a pumice stick.

2. Fix curling wallpaper: Use an artist’s brush to apply wallpaper repair adhesive to wall. Press into place with a seam roller, then remove excess with a damp sponge.

3. Patch a gutter hole: Using tin snips, cut away any rusted or corroded metal surrounding the hole. Make a patch using the same material as your gutters (aluminum, vinyl, copper, zinc, etc.) several inches larger than the hole. Glue the patch inside the gutter with a bead of roofing cement.

4. Seal air leaks around an outlet cover: Whatever you do, do NOT fill the electrical box with foam. It traps heat from wires and becomes a fire hazard. Instead, remove the plate and caulk the seam where the electrical box meets the wall board. Get a foam gasket and place it around the receptacle, then reinstall the cover/plate.

5. Get rid of a bee’s or hornet’s nest: After dark (when the insects are less active or dormant), take a jet-spray insecticide and soak the entrance to the nest, standing 10 to 15 feet away for safety. If the hive shows no activity the next day, throw the nest away.

6. Get rid of stubborn weeds: Instead of hand-weeding, cut the weed to the ground. When it begins to grow leaves again, paint an herbicide like Roundup on the leaves with a foam brush, coating them all. The weed, including the roots, should die completely.

7. Measure without a tape measure: Use household items like a dollar bill (6 inches long), a credit card (2 inches wide), and a soda can (5 inches tall).

8. Get rid of ants: Don’t just poison the visible ants. Set out bait (or have an exterminator do it) for them to carry back to the entire colony.

9. Speed up compost: Take a bit of last year’s completed compost and add it to the new pile. It already possesses the fungi that jumpstart the process.

10. Thaw a frozen pipe: Use a heating tool such as a hair dryer, a heating pad, or a space heater and point it at the pipe. Do NOT use a blow torch!

11. Touch up flat paint: Flat paint is incredibly unforgiving. To do a touchup without it looking obvious, use a foam brush or roller and paint with vertical strokes. Apply the thinnest coat possible.

12. Clean window screens: Vacuum both sides of the screen with a brush attachment, and then clean with a sponge using a regular household cleaner. If possible, you can clean the screens in a bathtub filled with hot water. Rinse them under the shower.

13. Clean a greasy range-hood filter: Run the filter through the dishwasher. If it’s extremely dirty or clogged, though, you should buy a new one.

 Check back in the future for more installments of life hacks for homeowners! 


search-sc-homes

Screen Shot 2021-06-07 at 2.13.38 PM copy.png

Leverage Seal 1.png191